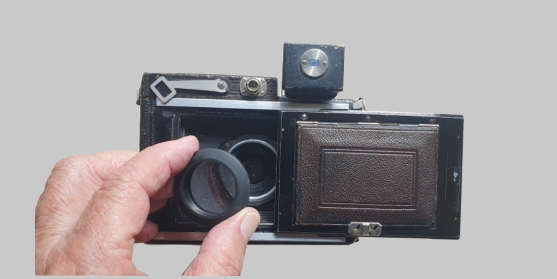
"Please note that the self-timer cannot be used without damage to the shutter when the shutter has been set to 1/200, T or B. Theshutter cannot be cocked when the shutter-time is set to T or B"
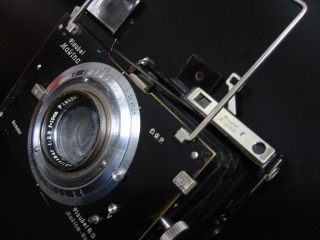
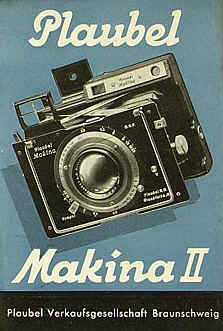
The PLAUBEL Makina II Black finish
interchangeable lenses available
Press Camera
1930-1939
by Jo Lommen
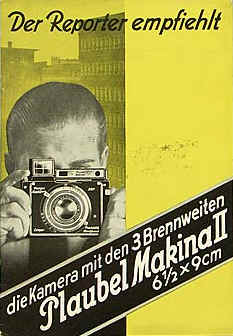
The press man recommends the Plaubel Makina II 6
1/2 x 9 cm the camera with 3 focal
length
Plaubel Makina II - Plaubel Salesdepartment Braunschweig"
The Plaubel & Co., Frankfurt/Main -Germany, founded in 1902 by Hugo Schrader, son-in-law from Dr. Kruegener, produced the Plaubel Makina II starting in 1933 up to 1939 with coupled range-finder and an Anticomar 2,9 / 100 mm High Speed lens.
The Makina I was its predecessor and lacked the coupled rangefinder. Type1was produced in the early twenties with an Anticomar 4,2/100 mm. The direct vision optical Newton view finder was placed in the middle of the camera and equiped wit a dial in stead of a rim. On type II the direct vision optical viewfinder moved to the edge of the camera . Other improvements were: A supply to let the air out of the bellows while closing it, a blue eyepiece mounted in a square level and as from 1927 a strap holder.
Producing strut folding camera’s came to an end in the fifties of the last century, but Plaubel continued the production and improved the Makina up to the sixties with the Makina III. Starting with the Makina I and followed by its successors, the Makinas were very popular with the press. Not only because its small and handsome design, but especially its reliability and very fast Anticomar 2,9 lens. The solid camera-body not only receives 6x9 cm sheet-film holders, but also the special Plaubel 6x9 roll-film holder. The adjustment to the camera of these devices is extremely reliable.
As you can see on
the pictures, the Makina II has a rim with aperture and shutter time
adjustment, a solid range-finder on top, a direct vision optical
viewfinder, a high speed lens, a compact design for that time and a very
reliable construction. But apart from this, the most attractiveness is
its design! It reminds me of the roaring twenties. Whether the front
plate is black or chrome, its a
beauty !
This is a beautiful, quality made, Plaubel Makina ii Rangefinder
medium format camera with a 10cm (100mm) f2.9 Anticomar lens system.
This made in Germany camera has a great black finish with nickel
metal accents offering a rangefinder, “sports finder” with parallax
correction and a ground glass. This camera takes 2-1/4
x 3-1/4” images on 120 film with its included roll film back and also shoots to sheet film with its included holder too.
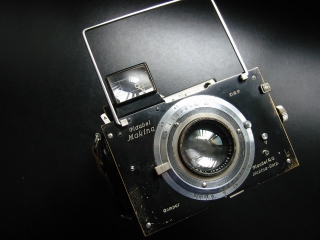
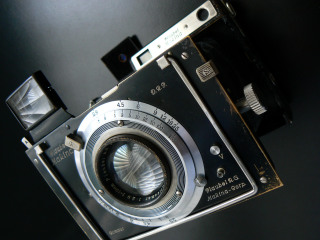
The Anticomar 1:2,9 / 10 cm is an ideal lens set in a Compur shutter for spontaneous work especially for pictorial work in landscape and portrait photography. Where a graduation of subtle grey tones, a soft definition and a certain plasticity is required, this lens is unsurpassed.A super compact camera with a nice geared focusing design
The Makina II is
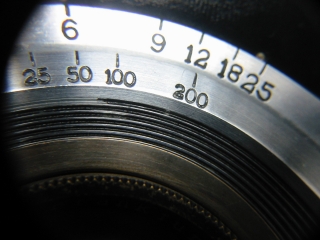
fitted with a Compur shutter with shutter times from 1/1 to 1/200 , "T"
and "B" and a non changeable Plaubel Aniticomar 2,8. F=10 cm. lens. "V"
(German=Vorlauf) = self-timer. To use this, press the "V" button
and cock the "S" (Spannen) shutter-level at the same time. You'll find
the diaphragm aperture control on the right side of the camera front,
marked "R"
"Please note that the self-timer cannot be used without damage to the shutter when the shutter has been set to 1/200, T or B.
Theshutter cannot be cocked when the shutter-time is set to T or B"
The beautifully designed Plaubel Makina II Press Camera

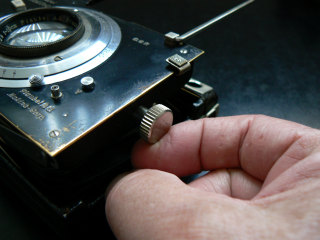 The camera has a very solid strut folding construction, easy to
handle and if collapsed, it will easily finds a place in the pocket of a
raincoat.
To open the camera, just lift the focusing knob upwards and the
front of the camera comes out of the housing. The strut folder mechanism
locks automatically if it arrives in infinity
position. To close the camera squeeze both knobs on top and on
the bottom of the front plate to unlock the strut folding mechanism and
press the camera front gently back into the
housing until it clicks.
The Plaubel Makina II is equiped with a direct vision Newton
Viewfinder, a sports finder with a hinged open frame-finder and a
focusing ground-glass with hood. If
you focus with the range-finder, you can check the adjustment
by reading the figures on the front (in meters).
Note: The rangefinder is only coupled to the Anticomars 1: 2,9 / 10
cm and
the 4,2 / 10 cm.
The Anticomar 1:2.9/10 cm. is an ideal lens for spontaneous work,
especially for pictorial work in landscape and portrait photography.
The camera has a very solid strut folding construction, easy to
handle and if collapsed, it will easily finds a place in the pocket of a
raincoat.
To open the camera, just lift the focusing knob upwards and the
front of the camera comes out of the housing. The strut folder mechanism
locks automatically if it arrives in infinity
position. To close the camera squeeze both knobs on top and on
the bottom of the front plate to unlock the strut folding mechanism and
press the camera front gently back into the
housing until it clicks.
The Plaubel Makina II is equiped with a direct vision Newton
Viewfinder, a sports finder with a hinged open frame-finder and a
focusing ground-glass with hood. If
you focus with the range-finder, you can check the adjustment
by reading the figures on the front (in meters).
Note: The rangefinder is only coupled to the Anticomars 1: 2,9 / 10
cm and
the 4,2 / 10 cm.
The Anticomar 1:2.9/10 cm. is an ideal lens for spontaneous work,
especially for pictorial work in landscape and portrait photography.
Where a graduation of subtle grey tones, a soft definition and a
certain "plasticity" is required this lens is unsurpassed.
To couple the Tele-Makinar 1:6,3 - 21 cm- , take the
regular Anticomar front and rear lens out of the camera and set
the diaphragm at 2,9 - the largest opening.
USING LENSES
Tele Makinar
for Landscape
1) preparation: remove
front and rear lens from the camera and set diaphragm open on 2.9
2) set Tele Makinar at infinity
3) use focus knob to set ground glass till far away subject is in focus.
4) make notes or mark distance scale
5) Set exposure speed on camera and diafragm on Tele Makinar.
Setting aperture diaphragm always use the Tele Makina lens
setting rather than the camera diaphragm setting rim
Tele-Makinar
For Portrait
1,5 meter = 5 feet
preparation: remove front and rear lens from
the camera and set diaphragm open on 2.9
Set both camera and Tele Makinar on infinity.
Mount conversion lens T 1,5 on Tele Makinar.
Set exposure time
No further setting necessary. Camera has been set now to focus
on 1,5 meter.
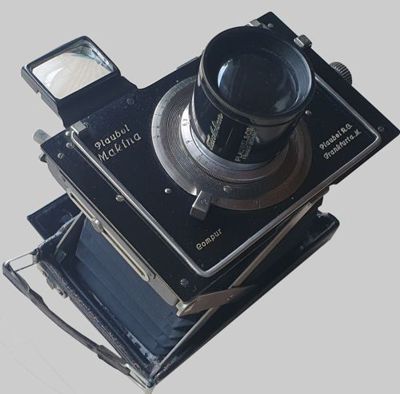
Tele-Makinar 1:4.8, f:19 cm. (71/,4i n.)
Front and rear lens of the Anticomar
should be removed
before installing the Tele Makinar
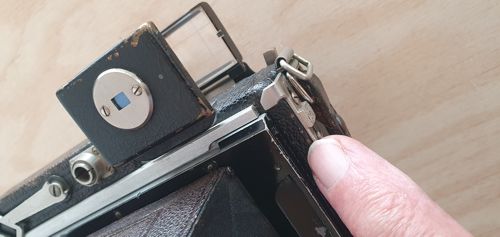
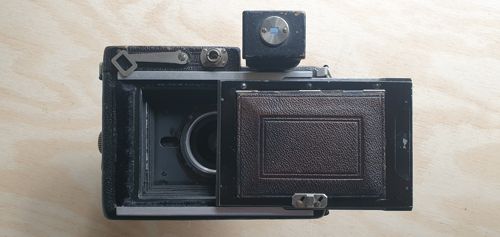
unlock ground glass vieuwing device and slide it out of the camera back.
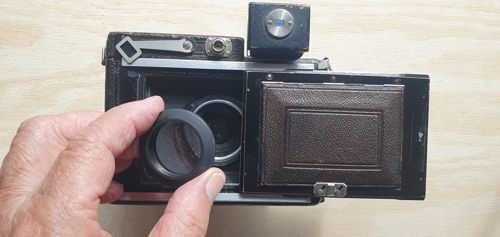
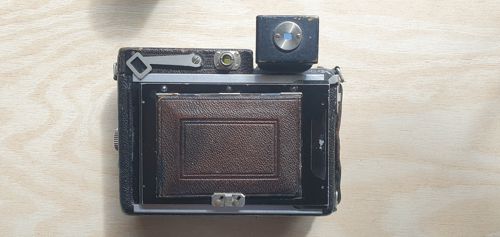
fold camera before unscrewing and removing rear lens
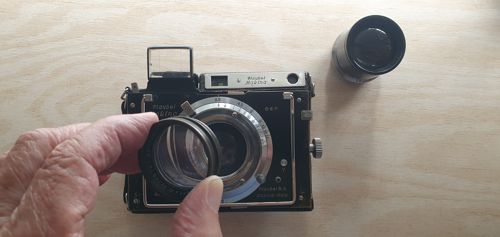
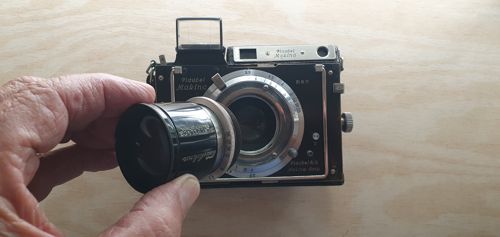
unscrew and remove front lens and replace it with the
Tele Makinar
Before installing the Tele Makinar,
unlock and slidie the ground glass assembly out of the camera back.
The rear lens can be twisted out very easilly.
Care should be taken when replacing the tele lens.
Misaligned Mount:
Use no force!
Ensure that the marks on the lens align perfectly with the corresponding mark on the camera body.
Line them up completely before attempting to twist.
If you'd feel any resistance while twisting the lens, stop immediately,
carefully turn back and try again to find the right thread.
To mark the different image areas covered by the Tele-lens, the front optical viewfinder shows the frame engraving.
The changing and the removal of the Tele-Makinar S does not differ from that of the Anticomar.
On some Makina cameras you will find a red triangle, and another red mark is on the diaphragm ring of the Tele-Makinar.
In order to enable the photographer to read the stop-numbers
from above it is recommended that the two red markings on ring and
front-panel
should coincide when the Tele-Makinar is inserted.
However, should it be screwed in differently, no harm will be done.
The Tele Makinar as well as the Anticomar have their own iris-diaphragm that can be set in the usual way.
On top of the lens barrel, stop numbers are engraved, and above them are placed the distances in metres or feet.
These two scales together form a convenient depth-of-field-ring
giving the correct depth of field for every aperture.
The Tele-Makinar S employs the same catch spring as the
Anticomar.
It is semi-automatically coupled to the range-finder, which means that the distance is measured with the range-finder
and then read off from the Anticomar-scale.
helical mount
The focusing device of the camera remains unaltered, but the
distance measured is set on the Tele-Makinor, which has its own distance setting
in its helical mount.
For instance: The subject is 9 feet away from the camera.
Measuring with the range-finder results in the Anticomar scale
showing a distance of 9 feet.
Now the Tele Makinar l.:4.8/19 cm by virtue of its helical
mount is also set to 9 feet, without altering the distance
setting of the camera.
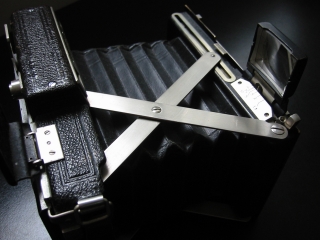
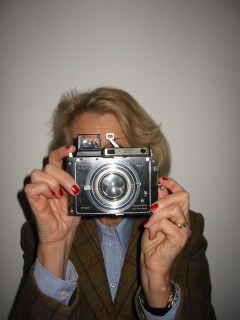
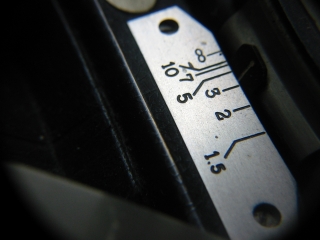
To hold the camera in the right position to shoot, you have to practice. Forget the strap! You’ll better take fast the camera on the back with your left hand, holding your fingers in the inside of the camera-back, and the front with your right hand, so that your finger can touch the shutter release knob "A"=Auslöser). Then move with your left hand to the distance adjusting knob to focus. In the mean time you have to hold the camera with your right hand on the front plate, having almost no grip. I think they never heard of ergonomic at that time. The successor, Makina III, came with a handle on the front, which was just a poor improvement.
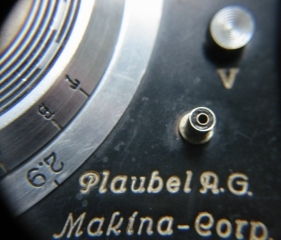
Pressing the knob "V" and
cocking the shutter at the same time
loads the self timer, a mechanic device that gives some
seconds delay between pressing the release knob and firing the
shutter.
The German name for self timer is "Vorlauf"
The flash synch
on the Makina II is for bulbs only, since it makes contact
milliseconds before the shutter opens, to wait for the peak of
the flash. So it makes no sense to connect an electronic
flash. The photo will be dark, because the flash will go off
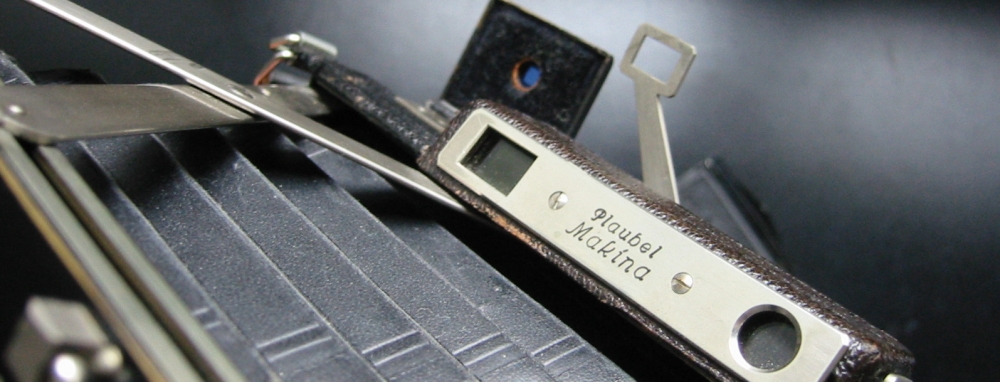
before the shutter has been totally opened. Three focusing
features are standard on the Plaubel. The sportsfinder with
hinged frame on the front and sight for frame finder on the
back. Eye piece for the coupled rangefinder in the middle and
a blue lens for focusing with the Newton optical viewfinder in
front.
Rangefinder
The rangefinder of the Plaubel Makina is based upon the, coincidence principle i.e. it contains 2 mirrors,
one rigid and one adjustable the latter of which is moved by the focusing device of the camera, When looking through the eye-piece of the range finder you will see a rectangular image
of yellowish colour and a small round picture of white-colour.
By turning the focusing screw (on left
front side of the camera front, the strut folding mechanism of
the camera adjust simultaneously the front plate and the
moveable mirror in such a way that the circular white picture
moves over the yellowish one. When both pictures coincide the
picture is correctly focussed and absolutely sharp.
How to readjust the rangefinder
The Makina II S and Makina III
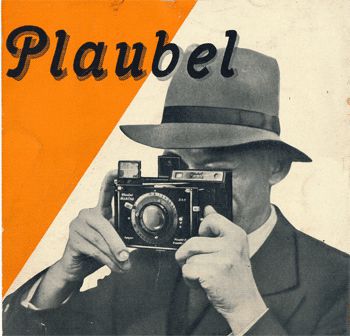
Cover of a Plaubel 1936 advertisement booklet.
Sometimes the adjustment is incorrect and the rangefinder must
be readjusted.
follow this link to learn how.
Important tip
when using film holders.
Although the Makina is fitted with efficient air
ducts, suction of the bellows is unavoidable and could
make the film curve when the dark slide is open. First
open the camera and next draw the dark slide. This measure
is superfluous if the f stop is set on 6 or higher.
Smaller apertures for increasing the depth of field will
overrule the curve of the film.
Focal Plane Accessory Unlike the Makina II which was equiped
with a fixed lens, the successors Makina II S and the Makina
III became interchangeable lenses with all lens elements in
front of the shutter. There was also a focal plane shutter
available to mount on the back of the camera.
(100-200-300-600-1000 sec). The detachable Focal Plane
Shutter unit is slit into the rails on the camera back.
Owing to the thickness of the shutter the extension of the
bellows has to be altered to restore the distance between
lens and film plane.
Chrome finish plus interchangeable lenses.

The Plaubel Makina II S camera with chrome front plate.
Both cameras the Makina II as well as the Makina II S and even the Makina III
can be equiped with the Makina Roll Film back.
the camera exposure time dial is set on Time.
The photographer is about to press the release button
which undoubtedly would lead to a shaked blurry photo.
In my opinion a mistake of the marketing department...
How to use the Plaubel Roll Film Back.
More Plaubel Makina Cameras
Repairing Plaubel Makina II
Rangefinder adjustment
Repairing Makina II S
Home Jo Lommen
Camera
European
Press Cameras