DIY
New Bellows
for the Marvellous Designed
3 1/2 x 5 1/4 Compact Graflex
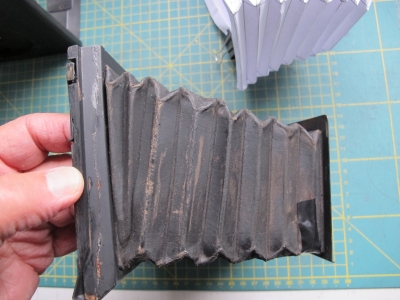
by pulling out the lens board as far as possible the bellows may show its imperfections.
Before working on the camera, remove the focussing hood and ground glass.
Cover the
mirror to protect its silver sensitive surface coating.
Never rub such a mirror. Cleaning only with a nylon static dust cleaner.
To start disassembling separate the bellows including inside front plate from the back of the lens board.
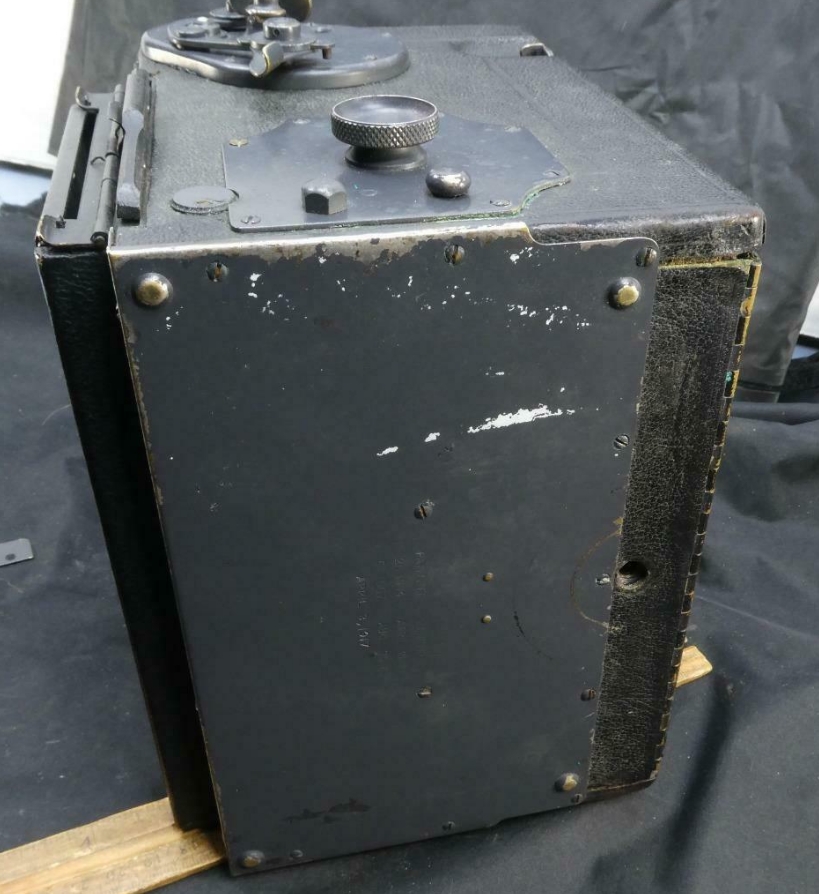
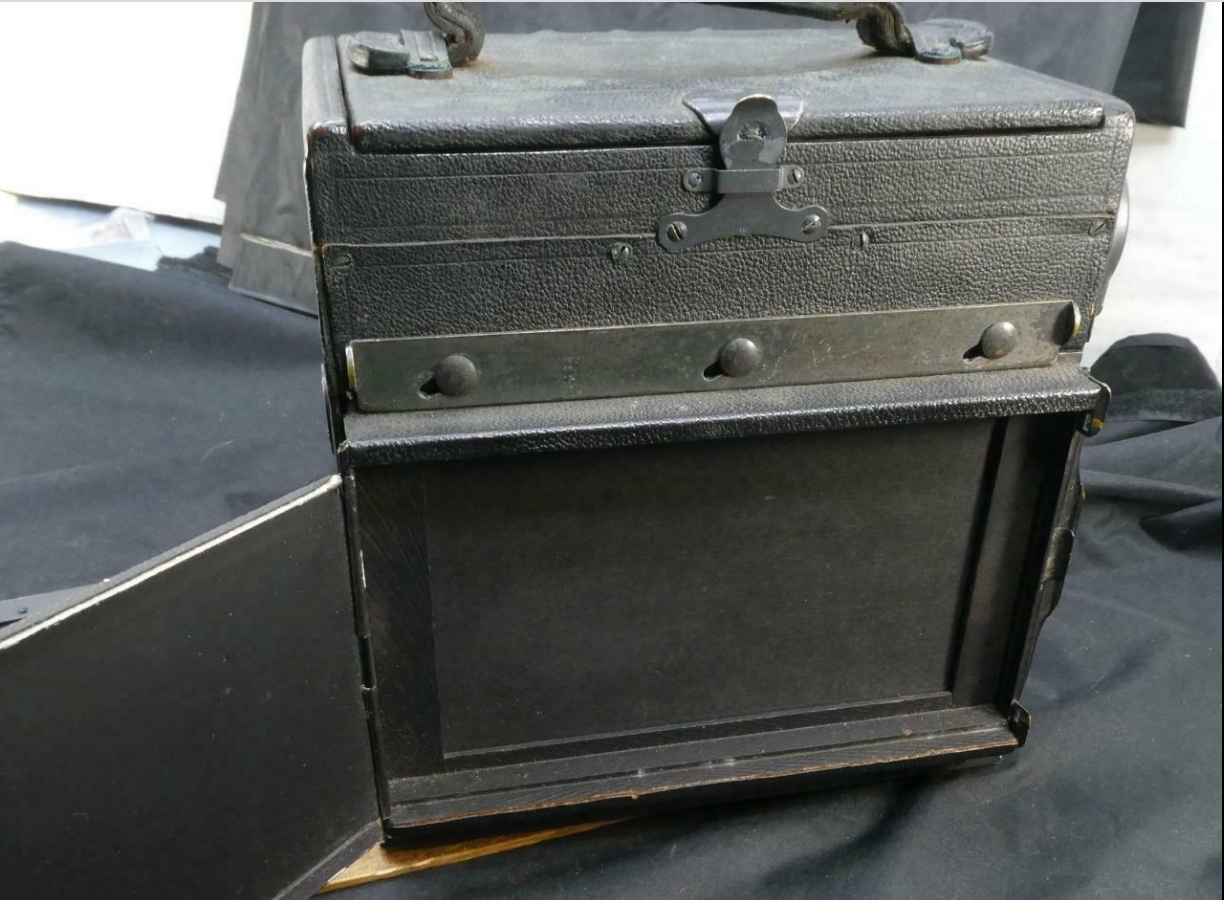
Photo on the right: Backside with film holder. Don't remove
film holder to avoid touching the focal plane shutter or use a cardboard
protector shield.
Make sure the mirror is in horizontal position.
Start inspection of the camera before beginning to
disassemble.
Note the grey plate cover protecting the mirror setting assembly shown on the
left photo.
Right photo. Check the working of the focal plane shutter. Unlike most of the
Graflex focal plane shutters, this one is equipped with a third blind which
raises
while the mirror is set in focussing position and thus at the same time protecting light coming into
the exposure chamber.
Now
the normal curtain setting by key winding can be done without the need of
the dark slide.
Check the working of this.
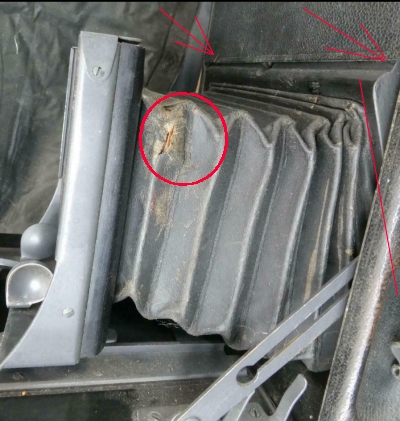
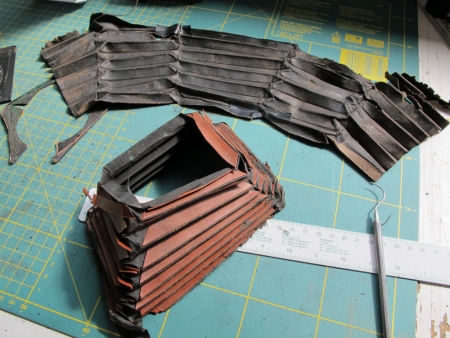
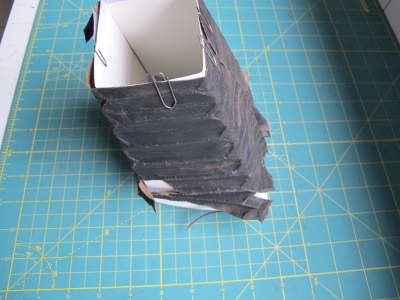
Remove old worn Bellows
Start the work to remove the old worn bellows.
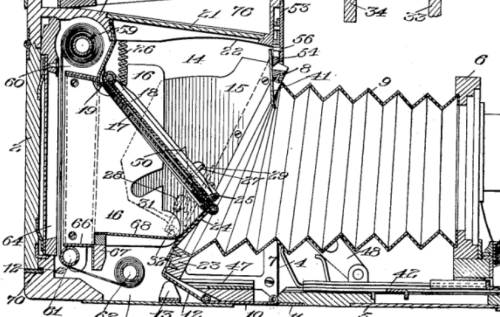
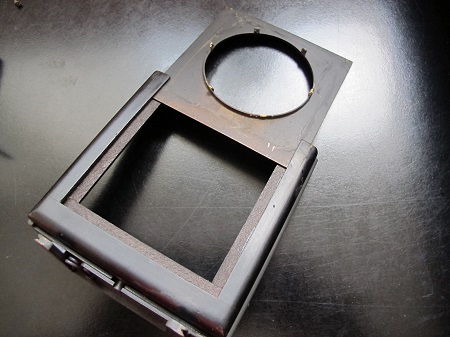
To remove the lens including the lens board unscrew the top plate of the lens
standard and slide the lensboard including the lens upwards out of the standard.
Store the lens on a save place.
Remove the infinity screws on front of the track and pull out the lens standard.
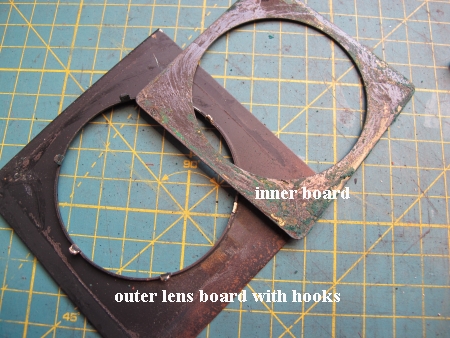
The outer board is coupled with the board inside the bellows.
Separate them by carefully bending the little hooks holding the inner lens
board. The inner lens board can be taken off now.
If you bend the hooks too much they might brake off, so you better bend just
enough to be able to get the outer board separated.
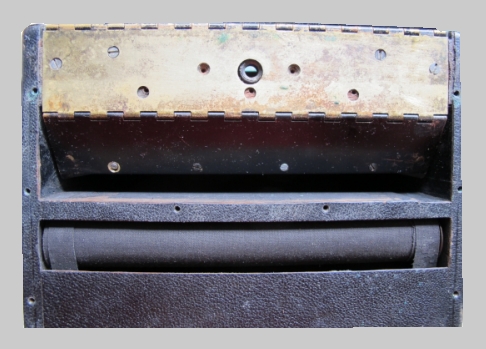
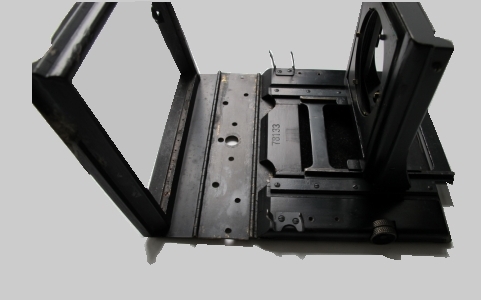
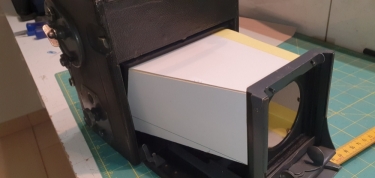
Above picture shows the slant position of the bellows frame
positioned in front of the exposure chamber.
It also shows the hinged drop bed with track and front lens plate taken apart
from the camera.
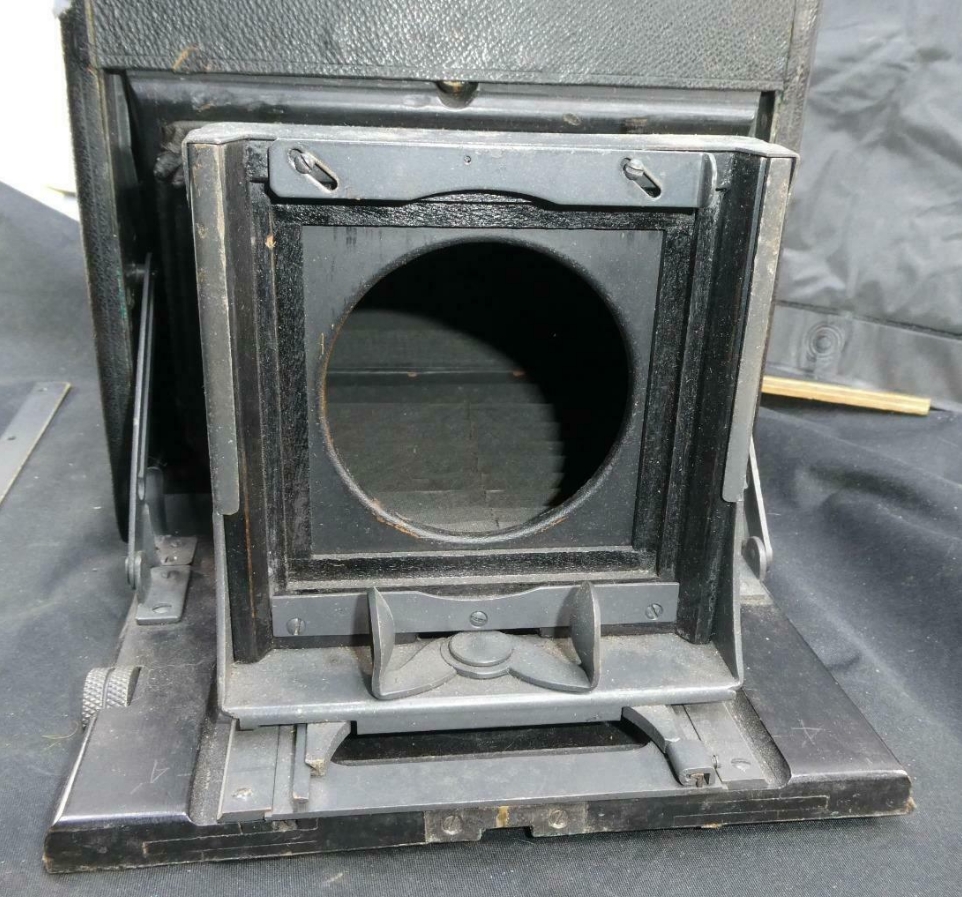
To isolate this part of the camera the front lens board should be taken off and
pulled through the slit in the bottom of the camera housing.
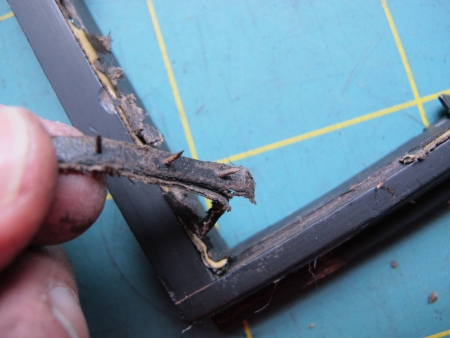
The bellows inside the camera house is fastened to a wooden frame by nails and you have to be very
careful getting the little nails out without breaking the frame.
Be aware that you won't find those very tiny nails in your local hardware shop
nor in their surrounding world, so you'd better try to get them out of the frame
without spoiling them.
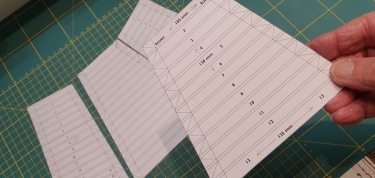
The separated bellows is very useful for
taking the measurement to create the new bellows. Take length measurement of the
four folds and
length and width of the frame and inner lens board. Make a dummy out of
thin cardboard for testing purposes.
Making New Bellows.
The slant shaped bellows are not easy to design and manufacture.
First make a paper or cardboard dummy to check if the old bellows fits around it
and if the slant end fits precisely into the bellows frame.
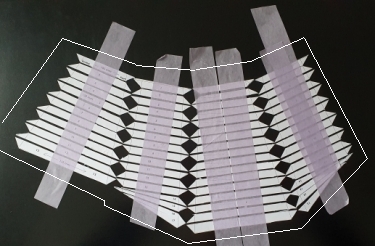
Use Photo Shop® or Coral Draw® to design the bellows folds. Print them on normal print paper
and glue them to the dummy cardboard design. (right picture below)
9 mm for each stiffener, 2 mm for the space between them and so on.
cut out the space between the stiffeners and make sure to use
removable tape to consolidate their position.

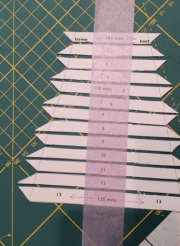
If the drawings are ready cut two pieces of fabric out of the BK5 Black Nylon fabric.
One piece for the outside and one for the inside cover. Take at least one inch more
than your pattern.
Only use spray glue and and glue the stiffeners to the BK5-Black Nylon Blackout fabric.
You should end up with a round closed model which needs to be formed with your
fingers to the bellows.
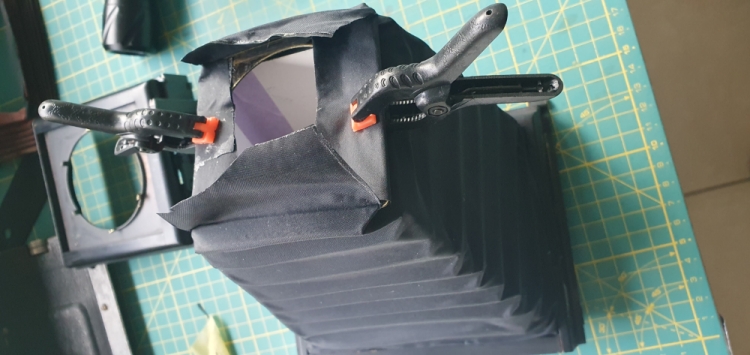
Mount
the inner lens board into the front of the bellows.
I used the test cardboard dummy to
hold the new bellows strait while working on it.
Mount the back of the bellows to the frame using the original tiny nails.
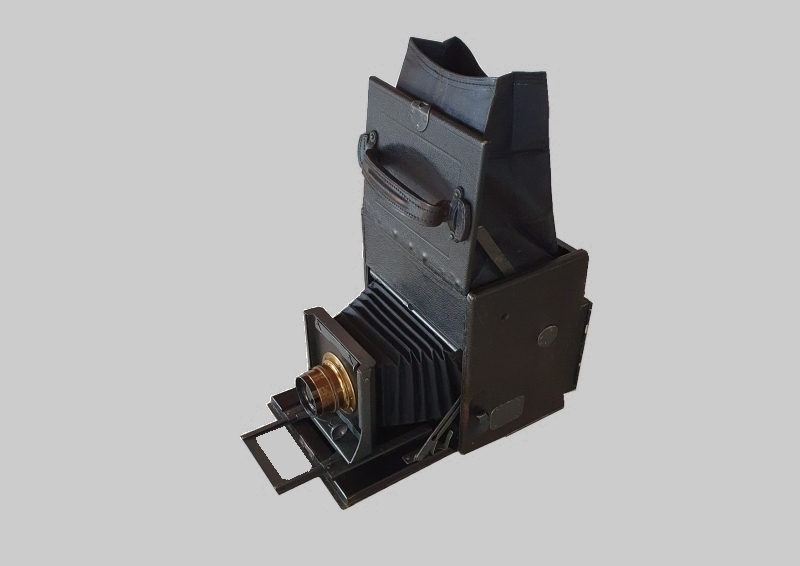
I'm really happy to
present the overhauled 1917 Compact Graflex in perfect working condition
equiped with new bellows.