
Focal Plane shutter
Repair
(1)
Light Leak Testing.
Working with classic cameras is far from easy and it can easily happen that your negatives are fogged after exposure. To find out what the reason is, we have to take a very good look at the fogged spots by judging the sharp edge of the leak and think! Sometimes it indicates that something cast a light and that looks black or dark on a negative. If you use to slide the negative consequently on one particular way into the holder - let's say the notches right side up - then you know from which direction the light came in. To exclude the risk, use new film-holders. However, another possibility is that the camera has a light leak. The most obvious cause would be that the bellows has one or more pinholes. In that case the negatives look fogged almost all over the film like a veil, not specific on a certain spot. To find or exclude if that is the reason, you may try that out by shining with a torch inside the bellows while the room is darkened. Small pinholes will be visible then and can be repaired with a good quality black self adhesive tape on the outside. Use tape that matches with the leatherette of the bellows.
More difficult is finding the light leak in the camera itself. In that case the negative may show a horizontal or vertical light stripe. Sometimes on one side, left or right. Sometimes just a small fogged part on one of the sides or even on top or bottom of the negative. Try this first, it is the easiest way to find out what is wrong: Place the camera - without the film holder and without the focusing ground glass- in a dimmed room. Remove the lens board with lens and draw the bellows half way out. Now take a small electronic flash or a small digital camera and fire flashes inside the bellows while keeping an eye on the camera back, especially around the back frame area and the curtain of the focal plane shutter. If you can see flash light become visible out of the camera, than you probably have found your light leak. Use black mat tape or something else like black velvet to repair the leak. Check everything carefully and check again.
Now if you want to test the camera, place the camera on the table and close the front shutter as well as the focal plane shutter. Place the film holder including two unexposed films with the #1 film to the front and draw the dark slide. Take your electronic flash and fire flashes on the camera from all directions. Close the dark slide. The second test should be done to ensure the good working and light leak proof of the focal plane shutter. Pull the film holder out of the camera-back turn it around and replace the film-holder with #2 to the front but leave the dark slide. Open the front shutter by setting the rim selector to "T" and trip. From now on the front-shutter should stay in "Open" position. Select subject, focus, set speed and diaphragm and wind the focal plane shutter. Your camera is ready to take a photo. Trip the focal plane shutter to expose and then push the dark slide back. After this exposure, develop both films. If film # 1 is completely blank without black or dark spots, it proves that no light has entered the film holder. If negative # 2 shows an acceptable nicely exposed photo after development, you may presume that you found and repaired the light leak. Your camera is reliable to be taken out in full daylight without risking fogged negatives.
(2)
Focal Plane shutter moves slow and unpredictable...
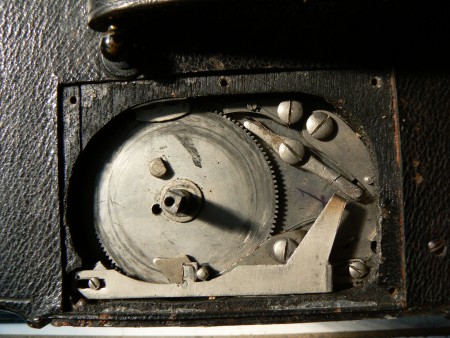
...or some speeds don't work at all. There are two possible culprits: The curtain or the spring loaded roller or even both of them. Sometimes the one hundred years old curtains are brittle or stiff. This in combination with a malfunction of the spring loaded roller, your shutter wont work at all or would be slow and unpredictable. Very often you can't wind the shutter more that half way until it jams. In any case you will have to find out what is the reason and what could be done to have it work again. Each camera has a framed back in which the film-holder or ground glass finds its place. Half a dozen screws are to be loosened to become access to the inner of the camera rear. An upper and a lower roller can be seen connected by a curtain. Very often you can see on the structure of the curtain fabric that the rubberized coating has become brittle in all these years, due to temperature, moisture or dryness. However, if the shutter after releasing moves freely but flutters and stops half way, then it could be that the spring inside of the roller next to the bottom is weak. The spring could be activated again by winding up more tension. If that can't be done, the spring is broken or is loose and should be repaired or renewed. Note: Too much tension can break the spring.
Check spring inside the curtain roller
100 hundred year old focal plane shutter curtain.
I
tested several old shutter fabric to try to make it supple again, but
unfortunately it didn’t work out. May be just for a while, but not
permanently.
________________________________
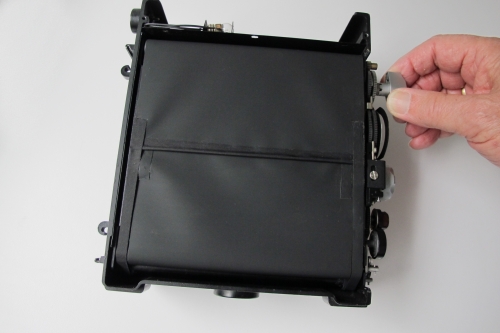
Self Capping
Focal Plane Shutter
Beseler Press Camera
There are at least a dozen different types of Focal Plane Shutters but I repaired just 3 or 4 of them. The first one is a self capping Focal Plane Shutter and may exist out of two separate curtain blinds, both not much larger than the back frame (film-size) of the camera. One blind is connected to the upper roller and the other to the lower roller. Both blinds are connected with straps to the opposite rollers. Two rollers (on the left) are tensioned by a build in adjustable spring. The other two are connected to a gear existing out of some gears, dial and winding mechanism. If it is a Reflex camera the shutter is connected to the mirror which covers the darkroom inside until the moment that the focal plane shutter is fired. This is the most complicated Focal Plane Shutter. Mounting a new curtain will be extremely complicated and demands technical skills.
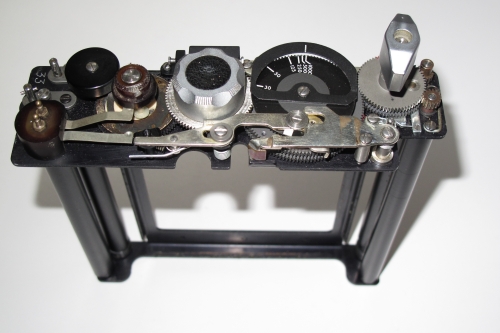
Self capping Focal Plane Shutter Beseler Press Camera. (no reflex)
_______________________________________
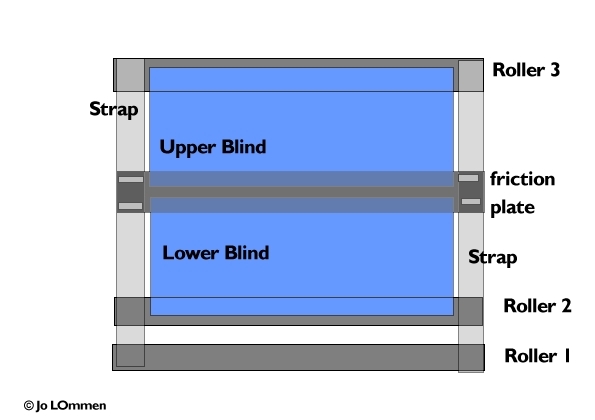
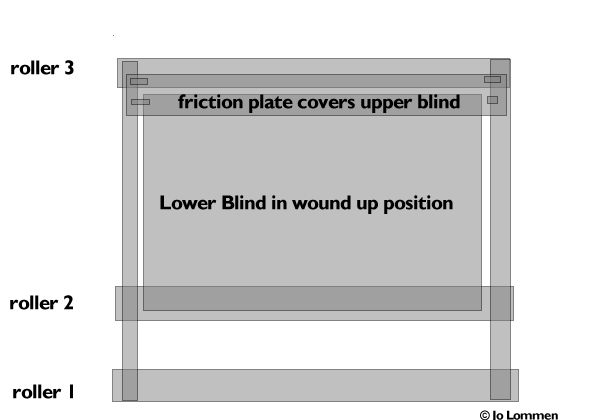
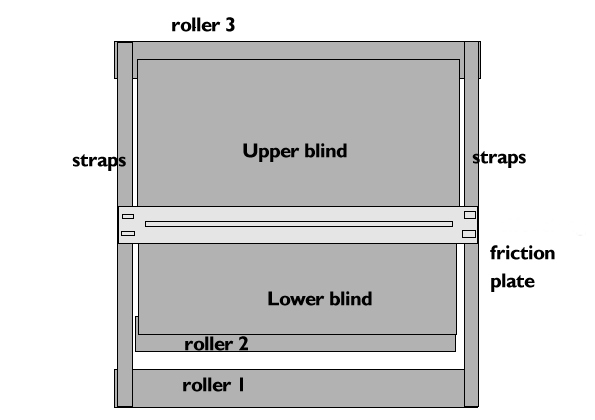
The Self Capping Focal Plane Shutter
Houghton Ensign Reflex
When winding the shutter, the upper blind draws the lower blind up using friction of a metal strip on top of the lower blind. This is perhaps the simplest design. The shutter exist out of two blinds and three rollers. Two of the rollers are situated on the bottom and one on the top of the camera back. The lower blind is attached to the nearest lower roller #2 and has a friction plate on top of it which is controlled by a set of tapes running from the other lower roller #1 to the second top blind which is connected to the upper roller #3. The straps together with the friction-plate allow the lower blind to travel upwards linked to the upper blind as a self capping shutter when the shutter winding key is wound. The upper blind can be wound further over the top on roller #3 to create the selected slit. (exposure speed) while the lower blind has come to its maximum range. When released, consequently the lower blind will travel first and the upper blind will follow immediately after the slit and finally covers the film frame again after the straps has been drawn back by the lower roller #1 back into the next start position. The length of the slit between the lower and upper blind to travel along the film surface determines the exposure time or shutter speed.
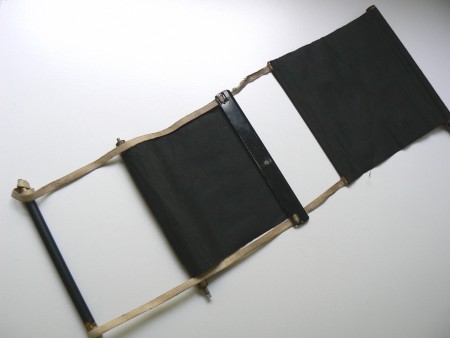
Ensign Reflex Focal Plane shutter exist out of two blinds, two straps, three rollers and one friction plate.
The friction plate is connected to the lower blind. By winding the shutter, the lower blind is linked to the upper blind by friction.
____________________________________
The long Graflex
4 or 5 slit Focal Plane Shutter.
The Graflex Focal Plane Shutter is a long curtain with 4 or more slits of different width. Apart from the winding mechanism absolutely not very complicated. However you'd need more focal plane shutter fabric. I presume that one has to have technical skills and is handy enough to handle a pair of scissors and know how cement can ruin your work or can be your best friend. Further more you need some space and a clean and big workbench to spread and to work on the fabric.

The existing metal flat rods (each slit has two of them) should be removed carefully but before doing that, the measurements from the old curtain should be taken very precisely. To mount the curtain exactly perpendicular to the rollers you may design your own double or triple layer cardboard template in which you cut out the shape of the roller. Perpendicular to the roller, draw two lines in which between the fabric should lay before gluing roller and fabric together.
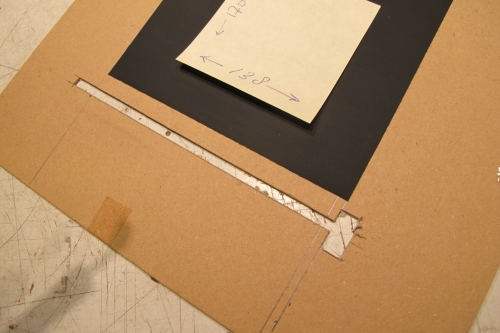
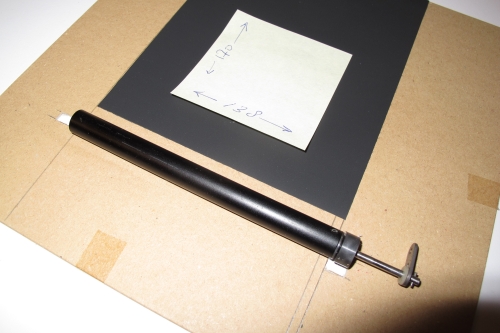
This was a first attempt. Later on I used triple layers for more stability for the roller.
Note: this is not a Graflex roller and curtain, but the principle is the same.