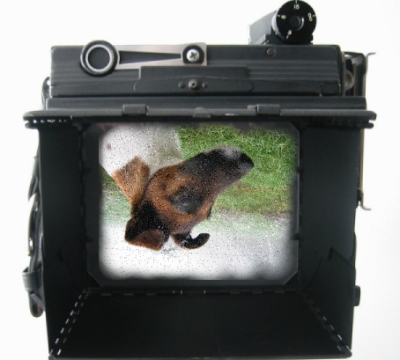
Focus, using any of the 5 methods described here
Undoubtedly
the best way to focus is
focusing by the Ground Glass !
Focusing using the ground-glass
No
doubt, the best way to focus is focusing on the ground
glass. Your Pacemaker Speed Graphic or Pacemaker Crown
graphic can be used like a view camera, however with some
restrictions. The Pacemaker Crown or Speed Graflex is for all a
press camera, but it has some extra advantages, like rising,
tilting and shifting the front standard, thus allowing the
photographer professional architectural or portraiture
photography. Even table top and still live will be
possible. For bringing these disciplines in practice one
needs the use of a ground glass. The Pacemaker Graphic is
equipped with a ground glass, protected by a removable
collapsible viewing hood. Once opened, it protects the ground
glass against direct sunlight thus giving the photographer the
opportunity to study his subject and check the composition and
sharpness of the image as it will appear on the film. As the
Pacemaker Speed has two shutters, both has to be open. The focal
plane shutter on Open and the front shutter on Time. You might
prefer to open the diaphragm to focus and then by closing the
diaphragm, you will be able to determine the area of sharpness
or depth of field which will be included at a given diaphragm
opening.
Before focusing, always move the lens-board to the infinity
stops which are mounted on the drop bed of the camera.
Focusing on the ground glass demands the use of a tripod.
If you want to
check if the image on your film holder equipment matches the
image on the Ground Glass
you may follow this link:


Another, far more
easy and faster way to focus, is by looking though the
rangefinder, mostly mounted to the right side of the camera.
However the newer models of the Pacemaker has a top mounted
rangefinder, which also includes a focus spot bulb for use in
dim light. Looking though the range finder you'll notice that it
only shows you a small part of the total image the tubular
finder on top shows you. You'll see a bright spot in the centre
of the round image which is a little colored. Now try, by
turning the knob on the drop bed to merge the double image
to only one . Practice some time and check your focusing
by reading the distance figures on the focusing bed. You
better also check it with the ground glass image. You may do
that on several distances to convince yourself that the
rangefinder works properly. Now check the figures on the
distance scale if they indicate the right distance.


Left photo: Scale
indicates Infinity set. On the right photo: Scale indicates 10
feet.
The easiest method however is just turning the knob
on the focusing bed, until the figures on the scale on the left
side shows the distance to the subject you want to focus.
So, if the distance is 8 feed, then bring the arrow of the
moving part of the bed , in line with the opposite "eight" from
the bed. To be sure the adjustment is correct you'll check
it now and then by comparing the rangefinder with the distance
table on the focusing bed as well as the image on the ground
glass.
There are different kinds of
focusing scales some of them have a number on the back. The
135 mm scale would be 30881 - 7 to ll
To make sure if you have the right scale for the lens you're
working with, test the position of the infinity stops. Pull
the lens standard against the infinity stops.
Diaphragm all open. Set Exposure Time on "T". Open shutter.
Open Ground glass hood and check the image on the ground
glass for its sharpest focus.
Check the distance scale. This should indicate the infinity
set.
Focus on a near by subject with the knobs on front of the
bed until the estimated distance is shown on the distance
scale.
Check the ground glass is the subject is in focus.
Repeat this with several distance settings.
Now you are sure you can rely on your distance scale.
Do not depend on judgement when subject is within tape
measuring distance.

On the 1955 and later Pacemaker Graphic you'll find a
top mounted range finder, with a built in battery
house and a 3 volt bulb. The bulb is
placed in de beam of the mirrors from the range
finder. If you push the little red button on the left
side from the top mounted range finder, you'll
see, two filaments, in fact the projection of
the filament of the electric bulb, on your
subject. By turning the focusing knob you'll see
the two filaments moving. If these two filaments
are merged, the distance to your subject is just fine.
The Kalart "Focuspot"
which can be mounted on each Graphic with a Kalart
rangefinder, works on the same principle.


As the word says, this is a finder for fast focusing
especially designed for sport and press work. The eye
piece on the rear and the hinged or collapsible open
frame finder at the front standard enables the
photographer to focus with one eye on the subject trough
the sports finder and with the other eye open, watching
the whole scene without missing anything. However
the distance adjustments has to be set on a certain
subject and the depth of field must be known. The
open finder exists out of two parts. . Pull the lower
section upwards first, thus providing access to the
knurled finger grips on the upper section, which can be
pulled upward as far as possible. The finder is fitted
with click stops, indicating parallax adjustment
settings. The open frame finder has three settings: 6 -
15 feet and infinity
Composition of the subject matter may be accomplished by any one of three different methods with the Graflex cameras- ground glass, optical view finder and open frame finder. However, optical and sports finder should not be relied upon to give a critical indication of the amount of subject.
The optical viewfinder needs the right mask to match with your lens.

For 4x 5 film size and 127 - 149 mm lens, use mask # 4.
For 4x5 film size and 150 mm - 162 lens, use mask 3
For 4x5 film size and 163mm - 171 mm lens, use mask 2