Adjusting the Kalart Range Finder
for 4 to 8 foot
Distances
Check the Range Finder 8 feet and 4 feet from the target. When using the Range Finder at such close distances be sure the upper eyepiece of the Range Finder is on the same level with and parallel to the target.
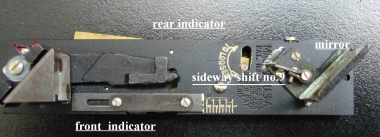
First, focus carefully on the ground glass using a magnifier and than check the Range Finder. If the image does not coincide at either of these distances, the front indicator is moved. If the movable image is high the indicator is raised slightly ad if it is low the indicator is lowered. To shift the indicator loosen the two screws. Each time the indicator is moved the Range Finder should be checked at infinity and if that adjustment has shifted it is readjusted. By checking against the image as focused on the ground glass at the close distance of 4 feet and 8 feet and the far distances of 15 feet and 25 feet as well as at the infinity and by making the necessary adjustments as explained, the Range Finder will focus subjects at all distances and the resulting negatives will be as sharp as if the focus has been obtained with the aid of a magnifying glass on the ground glass.
| Camera Type | Lens | Long Scale Rear | Short Scale front |
| 2 ¼ x 3 ¼ | 101 mm f:4,5 | 9,5 | 2 |
| 105 mm f:3,5 | 10,5 | 2 | |
| 4 3/8 In. f:4,5 | 13 | 2 | |
| 105 mm f:3,7 | 13.5 | 2 | |
| 3 ¼ x 4 ¼ | 120 mm f: 6,8 | 13 | 2 |
| 127 mm f: 4,7 | 14,5 | 3 | |
| 135 mm f: 4,5 | 15 | 3,5 | |
| 150 mm f: 4,5 | 18 | 4,5 | |
| 165 mm f: 4,5 | 20,5 | 6 | |
| 4 x 5 | 127 mm f:4,7 | 13 | 3 |
| 135 mm f: 4,5 | 15 | 3,5 | |
| 165 mm f: 4,5 | 19 | 6 | |
| 6 3/8 inch f: 4,5 | 17 | 6 |
Long scale rear adjustment
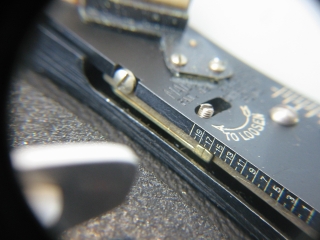
In the event that the two images cannot be coincided because of a lateral (sideways) shift of either one, this is corrected by loosening screw no. 12 and slightly turning screw no. 9 in Fig. F This adjustment is made while sighting the images through the finder. Then position the lever (13) parallel to the Range Finder as illustrated and tighten screw no. 12. In this position, carefully place the housing over the Range Finder making certain that the lever is engaged in the screw in the housing before pressing the housing down. Then fasten the housing to the camera with the four screws.
Any subsequent adjustments for side image, if necessary are made by turning the screw located at the outside of the Range Finder housing under the eyepiece. After each such adjustment, give the screw a slight turn in the opposite direction to avoid strain on the lever.
Short scale front adjustment