SYNCHRONISING THE RANGE FINDER
WITH THE LENS.
First of all: Infinity adjustment.
The following 4 steps are to be followed in readjusting the Range Finder for the same lens or another lens:
1) Check infinity focus of lens – if necessary relocate camera infinity stops.
2) Set Range Finder for infinity.
3) Adjust Range Finder for 15-25 ft. distances.
4) Adjust Range finder for 4-8 ft. distances
The first step in synchronising the Finder to a lens is to establish the correct infinity position for the lens
– if necessary relocate the camera infinity stops –
Use a tall building, chimney, flagpole etc. at least ½ mile distant as an infinity target.
SETTING THE RANGE FINDER FOR INFINITY
There are five different types of Range Finder installations and in the event your Range Finder is out of adjustment at infinity reset it in accordance with the applicable illustration following.
Anniversary Models

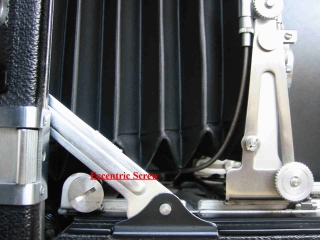
On all Anniversary Models of the Speed Graphic Camera, The infinity adjustment is made by turning the eccentric screw (see fig A) attached to the rear of the right runner of the camera track.
Move this screw very slightly back to raise the movable image and forward to lower the movable image.
You can use a dime to turn the screw.

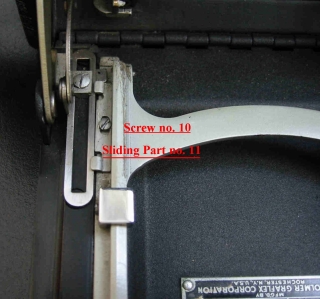
On Miniature Model Speed Graphic Camera, the infinity adjustment is made by Loosening screw no. 10 (see Fig. B) and moving the sliding part no. 11 back to raise the movable image and forward to lower it. Be sure to tighten screw no. 10 after setting this adjustment.